Floor tiling is a versatile and durable way to enhance any space, whether it’s a kitchen, bathroom, or living area. Achieving a professional finish requires careful preparation, the right tools, and proper technique. This guide provides step-by-step instructions for tiling a floor, ensuring a seamless and stylish result.
1. Tools and Materials You’ll Need
Having the right tools makes the process smoother:
- Tile Adhesive: Explore Kerakoll, UltraTile, Ardex, and Mapei for high-quality adhesives.
- Tile Spacers and Levelling Systems: Use Spin, T-Spin, or wedge systems to ensure flat, even surfaces.
- Tile Cutter or Wet Saw: For cutting tiles to fit edges and corners.
- Rubber Grout Float and Sponge: Essential for grout application and cleaning.
- Notched Trowel: For spreading adhesive evenly.
- Spirit Level and Tape Measure: To ensure accuracy and alignment.
2. Prepare the Floor Surface
Proper preparation is critical for long-lasting results:
- Clean the Surface: Remove debris, dust, and grease.
- Check for Unevenness: Use a spirit level to identify any dips or bumps.
- Apply a Levelling Compound: For uneven floors, use a self-levelling compound like UltraTile ProLevel Fibre to create a smooth surface.
- Prime the Floor: Apply a primer to porous surfaces for better adhesive bonding.
3. Plan Your Layout
Planning your tile layout ensures symmetry and reduces cuts:
- Find the Centre Point: Use a chalk line to mark the centre of the room.
- Dry Lay the Tiles: Place tiles without adhesive to visualise the layout and identify edge cuts.
- Check Alignment: Ensure tiles are square and align with the room’s focal points.
4. Mix and Apply Adhesive
- Mix the Adhesive: Follow the manufacturer’s instructions for consistency.
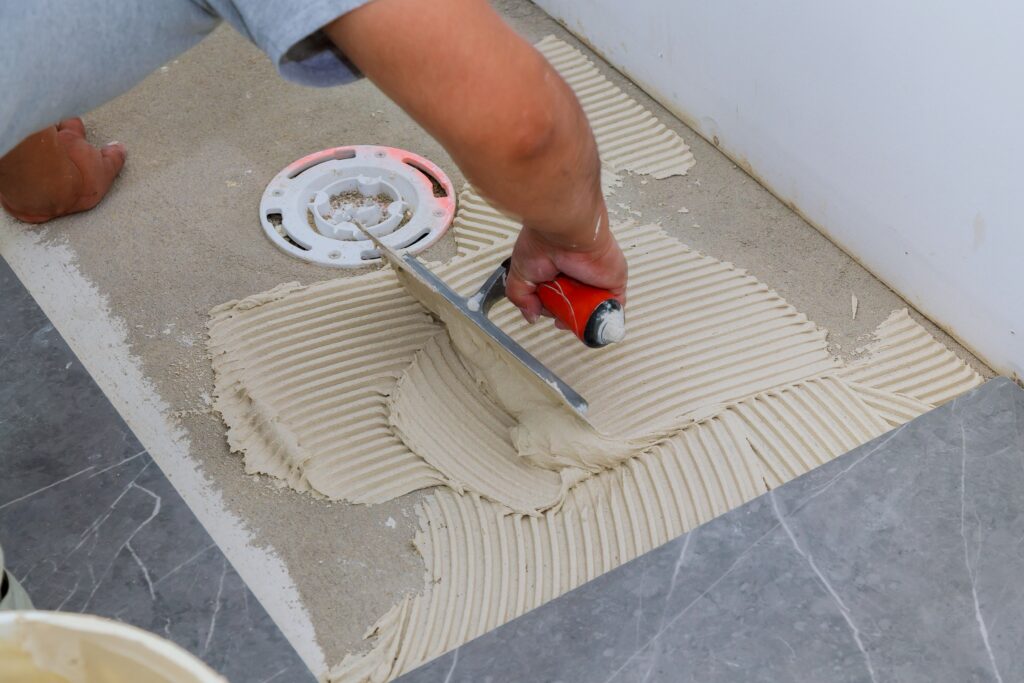
- Spread Adhesive: Use a notched trowel to apply adhesive evenly to a small section of the floor.
- Create Ridges: Hold the trowel at a 45° angle to form ridges for secure tile placement.
5. Lay the Tiles
- Start from the Centre: Begin at the intersection of your chalk lines.
- Place Tile Spacers: Use spacers to maintain consistent gaps.
- Press Down Gently: Apply even pressure to secure the tiles in place.
- Use a Levelling System: Insert levelling clips and tighten wedges or spin caps for perfectly aligned tiles.
6. Cut Tiles to Fit Edges
- Measure the Space: Use a tape measure to mark the size of the edge or corner tile.
- Cut the Tile: Use a tile cutter or wet saw for precision.
- Test Fit Before Adhesive: Ensure the cut tile fits perfectly before applying adhesive.
7. Allow Adhesive to Set
Let the adhesive cure as per the manufacturer’s guidelines, usually 24 hours, before walking on the tiles or grouting.
8. Grout the Tiles
- Mix the Grout: Follow the product instructions for a smooth consistency.
- Apply Grout: Use a rubber float to push grout into the gaps at a 45° angle.
- Clean Excess Grout: Wipe the tiles with a damp sponge to remove excess grout, being careful not to disturb the joints.
- Buff the Tiles: Once the grout sets, polish the surface with a dry cloth.
9. Add Finishing Touches
- Seal the Edges: Use silicone sealant around the perimeter for a watertight finish.
10. When to Call a Professional
If your project involves intricate layouts, large-format tiles, or challenging surfaces, hiring a professional tiler ensures a flawless result.
Conclusion
Floor tiling is a rewarding project that adds durability and beauty to your space. By following these steps and using the right tools and materials, you can achieve a professional finish. Visit The Tilers Hub for high-quality adhesives, grouts, and tools, including tile spacers and levelling systems.
