Hollow tiles can be a frustrating issue in any home, often signaling that the bond between the tile and the substrate has been compromised. This problem is typically caused by insufficient adhesive coverage during installation, such as not back buttering the tile or not using a suitable primer. Luckily, fixing a hollow tile is a manageable DIY project with the right tools and materials. This guide will walk you through the process of repairing hollow tiles using Fix-A-Floor Extra Strength Bonding Adhesive, available here.
Understanding the Problem
Hollow tiles occur when there is a void or gap between the tile and the substrate. This can happen for several reasons, including:
- Insufficient Adhesive Coverage: Not applying enough adhesive or failing to back butter the tile properly.
- Lack of Primer: Not using a suitable primer can prevent proper bonding between the tile and the substrate.
- Substrate Movement: Shifts in the substrate can create gaps under the tiles.
- Moisture Penetration: Water can degrade the adhesive over time, leading to hollow spots.
Tools and Materials Needed
To fix a hollow tile, you will need the following tools and materials:
- Fix-A-Floor Extra Strength Bonding Adhesive (available here)
- 10:1 thrust ratio caulking gun
- Drill and masonry drill bits
- Vacuum or dustpan and brush
- Damp sponge
- Weighted objects (e.g., buckets filled with water)
- Matching grout
Step-by-Step Guide to Fix a Hollow Tile
Step 1: Identify the Hollow Tile
Locate the hollow tile by gently tapping on the tiles with a wooden dowel or your knuckles. A hollow sound indicates a void underneath the tile, which needs to be addressed.
Step 2: Drill Holes
Using a masonry drill bit, drill 2-4 holes in the grout around the affected tile. Ensure the holes are evenly spaced to allow the adhesive to spread uniformly under the tile. Be careful not to drill into the tile itself.
Step 3: Clean the Area
Remove any debris and dust from the drilled holes using a vacuum or a dustpan and brush. Ensuring the area is clean will help the adhesive bond better.
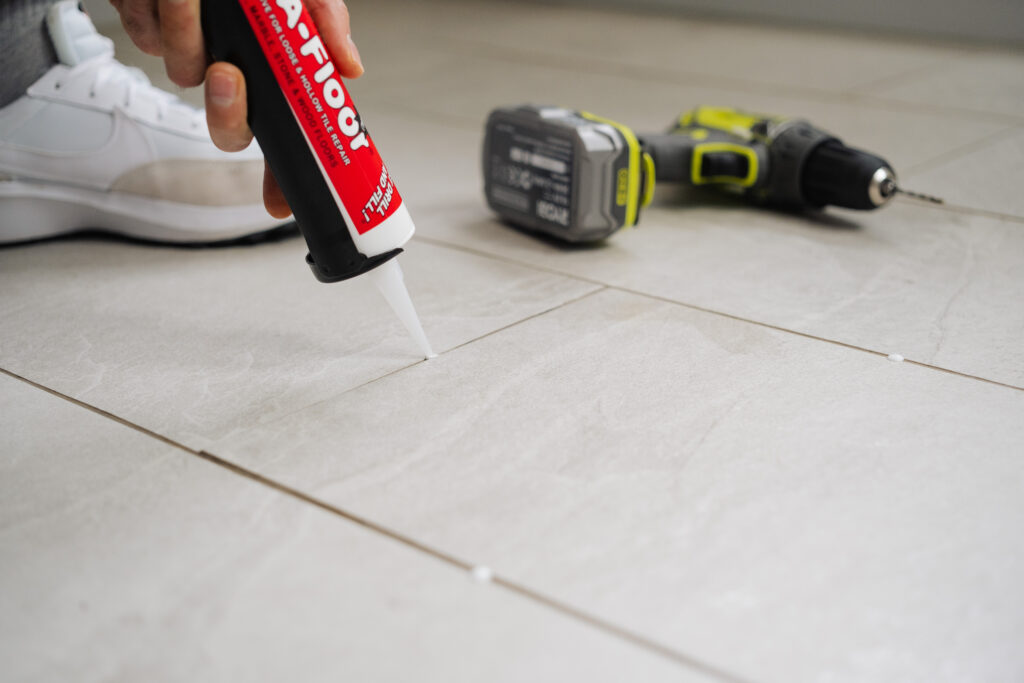
Step 4: Apply Fix-A-Floor Adhesive
Insert the Fix-A-Floor tube into a 10:1 thrust ratio caulking gun. Place the tip into one of the drilled holes and gently apply the adhesive. Use slow, consistent pressure to allow the adhesive to flow under the tile. Fill each hole until you see the adhesive starting to come out of the adjacent holes.
Step 5: Weigh Down the Tile
Place a weighted object, such as a bucket filled with water, over the repaired tile. This will help ensure the tile bonds securely to the substrate. Leave the weight in place for at least 24 hours to allow the adhesive to cure properly.
Step 6: Grout the Holes
After the adhesive has cured, fill the drilled holes with matching grout. Use a damp sponge to smooth the grout and blend it with the existing grout lines. Allow the grout to dry according to the manufacturer’s instructions.
Preventing Hollow Tiles
To avoid the problem of hollow tiles in the future, consider the following tips during installation:
- Back Butter the Tile: Always apply a layer of adhesive on the back of the tile (back buttering) to ensure full coverage and a strong bond.
- Use a Suitable Primer: Applying a primer to the substrate can significantly enhance the bond between the tile and the adhesive.
- Ensure Full Adhesive Coverage: Use a notched trowel to spread adhesive evenly on the substrate, ensuring no gaps or voids.
Conclusion
Fixing a hollow tile is a straightforward process that you can do yourself with the right tools and materials. Using Fix-A-Floor Extra Strength Bonding Adhesive, available here, ensures a reliable and durable repair. By following the steps outlined in this guide, you can restore your tiles to their original stability and appearance without the need for costly professional services.
Whether you’re dealing with hollow tiles in your kitchen, bathroom, or any other area of your home, Fix-A-Floor provides a cost-effective and efficient solution. Say goodbye to the hassle of hollow tiles and enjoy the peace of mind that comes with a solid, secure floor.
For more information and to purchase Fix-A-Floor Extra Strength Bonding Adhesive, visit The Tilers Hub.
By addressing the issue promptly and using the right products, you can extend the lifespan of your flooring and maintain the aesthetic appeal of your home. Don’t let hollow tiles cause you stress—fix them quickly and easily with Fix-A-Floor!